Best beginner reef corals: easy species that won't punish mistakes
This post contains affiliate links. As an Amazon Associate, I earn from qualifying purchases at no extra cost to you.
Entering the world of reef keeping often feels like a high stakes gamble where the currency is both your hard earned money and the lives of delicate marine organisms. Many new hobbyists rush into purchasing high end Small Polyp Stony (SPS) corals like Acropora only to watch them bleach and die within forty-eight hours due to minor fluctuations in alkalinity or lighting. This cycle of loss is the primary reason beginners leave the hobby. The secret to a successful first year is not found in expensive controllers or automated dosing pumps, but in selecting species that possess a wide margin for error. By focusing on hardy soft corals and specific Large Polyp Stony (LPS) varieties, you can build a thriving ecosystem that handles the inevitable learning curve of water chemistry management. Success starts with the right foundation, which includes basic supplies like Reefing Art Ceramic Coral Frag Plugs 100 Pack Free Aquarium Glue to ensure your first specimens are securely mounted and ready to grow.
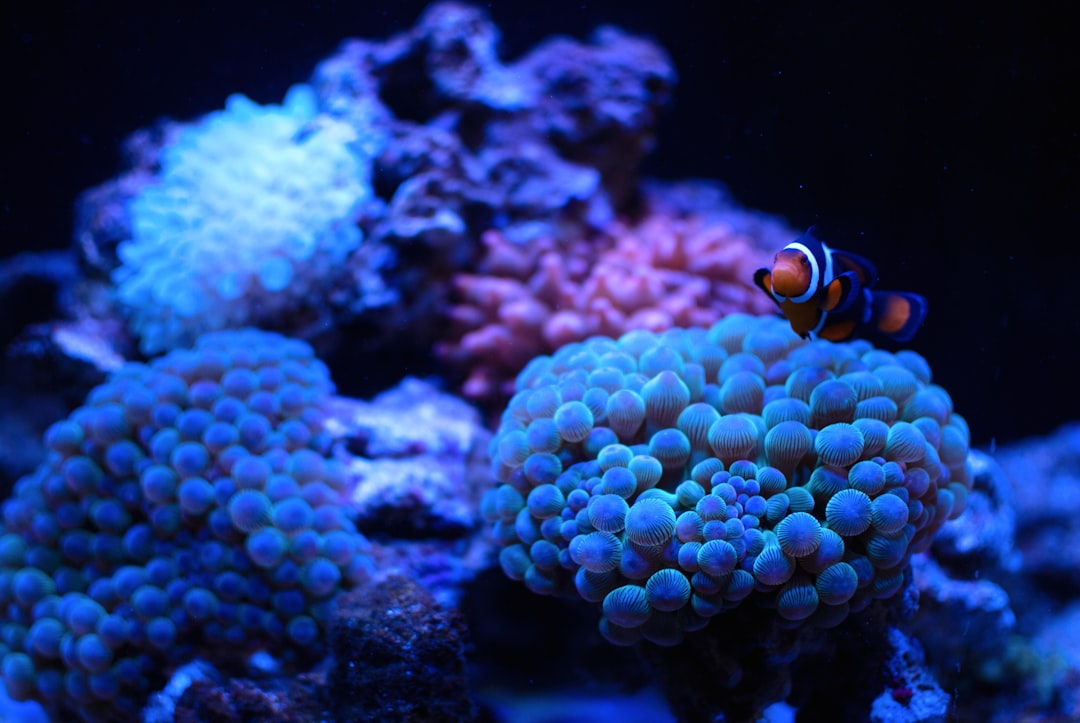
Photo by Unsplash Photographer on Unsplash
The Resilience of Soft Corals: Why Zoanthids and GSP Rule the Beginner Tank
Soft corals are the ultimate entry point for any new reef keeper because they lack a rigid calcium carbonate skeleton. This biological distinction means they are far less sensitive to fluctuations in calcium and alkalinity than their stony cousins. Among the most recommended species are Zoanthids (Zoanthus spp.) and Green Star Polyps (Pachyclavularia violacea). These corals are often described as the weeds of the reef tank, but for a beginner, this “weedy” nature is a significant advantage. They can survive in nutrient rich water that would quickly kill more sensitive species, and they are highly resistant to the swings in salinity that occur when an amateur hobbyist forgets to top off evaporated water.
Zoanthids are particularly prized for their incredible array of colors and patterns. They grow in colonial mats and are generally satisfied with moderate lighting and flow. While they do benefit from occasional target feeding with micro-plankton, they derive most of their energy from their symbiotic zooxanthellae. The main tradeoff with Zoanthids is their growth rate. In a stable tank, they can quickly cover adjacent rockwork, making it difficult to introduce other species later. A practical approach is to place them on isolated rock islands on the sand bed to prevent them from spreading to the main reef structure.
Green Star Polyps (GSP) offer a vibrant, neon green aesthetic and a unique flowing movement that adds life to the aquarium. They are nearly indestructible and can tolerate a wide range of lighting conditions, from low PAR (Photosynthetically Active Radiation) environments to high intensity zones. However, GSP is notorious for its aggressive growth. It can grow over glass, powerheads, and even other corals. To manage this, many experienced reefers suggest mounting GSP on the back wall of the aquarium. This creates a living green wallpaper effect while keeping the rest of the rockwork clear for more diverse species. When working with these corals, having a reliable set of tools like the PakCan Premium Coral Fragging Kit Complete Coral Propagation Set is essential for trimming back overgrowth and maintaining the balance of your tank layout.
Selecting Best Beginner Reef Corals in the LPS Category
Once you have mastered the basics of soft coral care, transitioning to Large Polyp Stony (LPS) corals is the next logical step. These corals provide the structural beauty of stony corals but are significantly more forgiving than SPS varieties. The Duncan Coral (Duncanopsammia axifuga) is widely considered one of the best beginner reef corals due to its rapid growth and clear indicators of health. A healthy Duncan will have wide, fleshy polyps that extend during the day and retract at night or when stressed. This visual feedback is invaluable for a beginner learning to read their tank’s needs. Duncans are not particularly picky about water quality, though they do require consistent levels of calcium and alkalinity to build their branching skeletons.
Another excellent LPS option is the Candy Cane Coral (Caulastraea furcata). These corals feature trumpet-shaped heads with bright centers, often in shades of neon green or teal. They are relatively slow growers compared to GSP, which makes them easier to manage in a smaller nano reef. The primary requirement for Caulastraea is moderate light and moderate, indirect flow. If the flow is too high, the delicate flesh can be pushed against the sharp internal skeleton, leading to tissue recession.
The Mushroom Coral (Discosoma spp. and Rhodactis spp.) should also be a staple in any beginner reef. While technically not LPS, they are often grouped with them in terms of placement. Mushrooms thrive in low light and low flow areas where other corals might struggle. They are incredibly hardy and can even survive in tanks with high nitrate levels that would be toxic to other inhabitants. The main challenge with mushrooms is their ability to detach and float around the tank if they are unhappy with their current placement. Using Saricho Ceramic White Coralline Coral frag Plugs Round 20pc to secure them in a low flow corner until they attach permanently is a standard recommendation for ensuring they stay where you want them.
Essential Water Chemistry for the New Reefkeeper
Maintaining stable water chemistry is the most difficult aspect of reef keeping, but beginner corals provide a safety net while you learn the ropes. To keep the best beginner reef corals healthy, you must focus on five primary parameters: Salinity, Temperature, Alkalinity, Calcium, and Magnesium. According to guidelines from the Reef Resilience Network, stability is often more important than hitting a specific “perfect” number. For most home reefs, a salinity of 1.025 to 1.026 specific gravity and a temperature between 76 and 78 degrees Fahrenheit are ideal.
Alkalinity is the most critical parameter for stony corals, as it acts as the primary building block for their skeletons and buffers the pH of the water. A target range of 8 to 10 dKH is recommended for beginners. If alkalinity drops too low, coral growth will stall and tissue may begin to peel. Conversely, if it is too high, especially in low-nutrient systems, corals can suffer from burnt tips. Calcium should be maintained between 400 and 450 ppm, and Magnesium should stay between 1300 and 1400 ppm. Magnesium is often overlooked, but it plays a vital role in preventing calcium and alkalinity from precipitating out of the water column.
Nitrates and Phosphates are the “nutrients” in the system. While many old school guides suggested keeping these at zero, modern research indicates that corals need some nutrients to survive. A nitrate level of 5 to 10 ppm and a phosphate level of 0.03 to 0.1 ppm will provide enough food for the corals without fueling excessive algae growth. If your nutrients bottom out at absolute zero, you run the risk of an outbreak of Dinoflagellates, which are far more difficult to clear than standard green hair algae. Regular testing using high quality kits is the only way to ensure these parameters remain within the safe zones for your livestock.
How to Properly Mount and Dip Your New Corals
Bringing a new coral home is a critical moment. You must assume that every coral from a store or another hobbyist is carrying pests like flatworms, nudibranchs, or unwanted algae. A strict dipping and mounting protocol is the only way to protect your display tank from an infestation.
- Inspect and Clean: Before opening the bag, inspect the coral for any visible pests. Once you move the coral to a temporary container with tank water, use a soft brush or a specialized tool from your fragging kit to gently scrub the frag plug or the base of the coral. Avoid touching the living tissue.
- The Chemical Dip: Use a dedicated coral dip (such as those containing pine oil or iodine) according to the manufacturer’s instructions. Place the coral in the dip solution for 5 to 10 minutes. Use a turkey baster to blow water into the polyps and crevices of the coral. This physical agitation dislodges pests that the chemicals have stunned.
- Rinse and Mount: After the dip, move the coral into a second container of clean tank water to rinse off any residual chemicals. Once rinsed, you can decide on placement. If the coral came on a messy or algae covered plug, it is best to remove it from that plug using bone cutters and glue it onto a fresh Saricho Ceramic White Coralline Coral frag Plugs Round 20pc.
- Acclimation: Place the new coral in a low light, low flow area of your tank for the first few days. This allows the coral to adjust to your water chemistry and lighting intensity without being overwhelmed. Slowly move it to its final position over the course of a week.
SAFETY WARNING: Many corals, especially Zoanthids and Palythoas, contain Palytoxin, one of the most potent non-protein toxins known. Always wear gloves and eye protection when handling corals. Never boil live rock or scrub corals under hot water, as this can aerosolize the toxin and cause severe respiratory distress or even death. Additionally, always ensure your aquarium equipment is plugged into a GFCI (Ground Fault Circuit Interrupter) outlet to prevent electrical shock in the event of a water spill.
Common Mistakes with Beginner Reef Corals
The most frequent mistake new reefers make is “chasing numbers.” This occurs when a hobbyist sees a slight deviation in a parameter, such as a drop in pH or a small rise in nitrates, and reacts with a massive chemical adjustment or a 50 percent water change. These rapid shifts are often more damaging to the corals than the original deviation. Corals are highly adaptable, but they require time to adjust. If you need to change a parameter, do it slowly over several days. For example, if you need to raise your alkalinity, do not add the entire dose at once. Split it into smaller doses over a 48 hour period.
Another common problem is over-lighting. Modern LED fixtures are incredibly powerful, and it is very easy to accidentally fry beginner corals. Species like Mushrooms and Leathers do not need high intensity light. If a coral appears shriveled or its colors are turning white (bleaching), it is likely receiving too much light. Use a PAR meter if possible, or start your lights at a lower intensity (around 30 to 40 percent) and slowly ramp up the power over several weeks while observing the corals’ reaction.
Finally, avoid the temptation to constantly move your corals. Every time you touch a coral or move it to a new location, it experiences stress and must expend energy to re-adjust its internal biology to the new flow and light patterns. If a coral is extended and looks healthy, leave it alone. Constant “aquascaping” is a surefire way to stall growth and cause tissue recession. Patience is the most important tool in your arsenal. The best reefs are those that are allowed to grow undisturbed for months at a time. For more on maintaining a stable environment, refer to professional standards from the World Register of Marine Species (WoRMS) to ensure you are identifying your species and their specific needs correctly.
The Role of Leather Corals in a New Reef Tank
Leather corals, primarily from the genera Sarcophyton, Lobophytum, and Sinularia, are iconic beginner species that provide significant biomass and verticality to a reef. The Toadstool Leather (Sarcophyton spp.) is a classic choice, featuring a long stalk topped with a wide, circular crown covered in polyps. These corals are incredibly hardy and can grow to massive sizes, often becoming the centerpiece of a beginner tank. They are also excellent at absorbing excess nutrients, which helps keep the water clean for other inhabitants.
A unique characteristic of leather corals that often scares beginners is their “shedding” phase. Periodically, a leather coral will retract its polyps and develop a shiny, waxy film over its surface. This is not a sign of death; rather, it is a biological mechanism to slough off accumulated algae and detritus. During this phase, which can last from a few days to a week, it is important to provide the coral with slightly increased flow to help the film peel away. Once the shedding is complete, the coral will often emerge larger and more vibrant than before.
The main tradeoff with leather corals is chemical warfare, known as allelopathy. Leathers release terpenes into the water to inhibit the growth of competing corals. In a small tank, these chemicals can build up and stress more sensitive species like LPS or SPS. To mitigate this, you should run high quality activated carbon in a media reactor or a high flow area of your sump. The carbon will adsorb the toxins, allowing you to keep a diverse mix of soft and stony corals without issue. Using a dedicated PakCan Premium Coral Fragging Kit Complete Coral Propagation Set allows you to occasionally prune these fast growers to ensure they do not physically touch and sting their neighbors.
FAQ: Frequently Asked Questions About Beginner Corals
How often should I feed my beginner corals? While most beginner corals are photosynthetic and derive the majority of their energy from light, they will grow significantly faster and show better coloration with supplemental feeding. For species like Duncans or Candy Canes, target feeding once or twice a week is sufficient. Use a specialized coral pellet or frozen mysis shrimp and gently place the food on the polyps using a pipette. For soft corals like Zoanthids, broadcast feeding with a liquid plankton substitute or a fine powdered food is more effective. Be careful not to overfeed, as uneaten food will quickly break down and raise your phosphate and nitrate levels, leading to nuisance algae outbreaks.
Do I need expensive LED lights for these easy corals? You do not need the most expensive lighting on the market to grow the best beginner reef corals, but you do need lighting specifically designed for marine aquariums. Standard “shop lights” or freshwater LEDs lack the specific blue spectrum (actinic) required for coral photosynthesis and fluorescence. There are many budget friendly reef LEDs that provide the necessary PAR for soft corals and LPS. The key is to ensure the light has a programmable timer to provide a consistent photoperiod, usually between 8 and 10 hours a day. Consistency in lighting is far more important for beginner species than having the highest possible intensity.
What should I do if my coral is not opening up? If a coral remains closed for more than 48 hours, the first step is to check your basic water parameters: Salinity, Temperature, and Alkalinity. If those are within the correct range, look for physical irritants. Is there a fish nipping at it? Is there a snail or crab crawling over it constantly? Is the flow too high, causing the flesh to retract for protection? If the water and environment seem fine, the coral may just be stressed or in a shedding phase (in the case of leathers). Usually, the best course of action is to wait. If you see visible tissue loss or a brown jelly-like substance, you may need to perform an iodine dip to treat a potential bacterial infection.
Conclusion
Building a successful reef tank is a journey of patience and observation. By selecting the best beginner reef corals - such as Zoanthids, Green Star Polyps, and Duncans - you give yourself the best possible chance of success. These species provide the visual beauty of a tropical reef while remaining resilient enough to survive the common mistakes every new hobbyist makes. Focus on maintaining stable water parameters, implement a strict dipping protocol for new arrivals, and avoid the temptation to over-meddle with your tank. Over time, these easy species will grow and multiply, creating a mature ecosystem that can eventually support more challenging corals.
Bookmark this guide to reference during your next trip to the local fish store.