How to frag and propagate soft corals
This post contains affiliate links. As an Amazon Associate, I earn from qualifying purchases at no extra cost to you.
Soft coral propagation is the most effective way to manage the growth of a reef tank while simultaneously building a sustainable ecosystem that does not rely on wild-harvested specimens. When a Sarcophyton leather coral or a colony of Zoanthus begins to crowd its neighbors, the health of the entire aquarium is at risk due to chemical warfare and shading. Fragging is the proactive solution to these space constraints. By mastering the techniques required to divide and mount these organisms, you can create new colonies for trade, sale, or placement in other areas of your display. To get started with the mounting process, you’ll need to pick up a high-quality adhesive like IC-Gel Coral Frag Glue for Reef Aquariums, which is essential for securing slippery soft tissues to stable substrates. Successful propagation requires more than just a sharp blade; it demands an understanding of coral biology, proper safety protocols, and a commitment to maintaining stable water chemistry during the recovery phase.
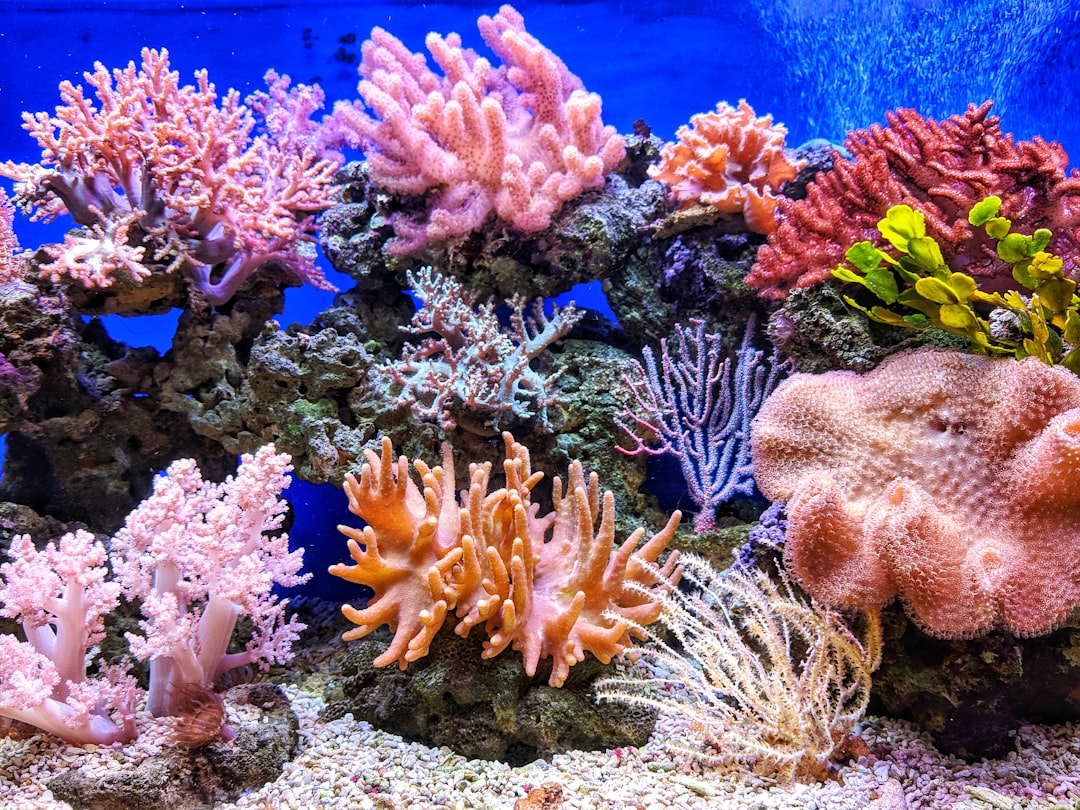
Photo by qui nguyen on Unsplash
Practical Tools for How to Frag and Propagate Soft Corals
Before you make a single cut, you must assemble a dedicated fragging station. Soft corals, particularly those in the Alcyoniidae family, produce significant amounts of mucus when stressed. This mucus can interfere with adhesives and irritate other corals if the fragging is performed inside the display tank. You’ll need a set of sharp, stainless steel scalpels or heavy-duty bone cutters for thicker-stalked species. Unlike stony corals that require saws, most soft corals can be partitioned with a clean, swift slice. A high-quality blade ensures that the tissue is not crushed, which significantly reduces the risk of infection and necrosis in both the mother colony and the new frag.
Substrate selection is the next priority. You’ll need a stable base for the new coral to attach its foot or stolon. Grab a pack of Oceans Wonders Coral Frag Plugs to provide a uniform surface that fits into standard frag racks. For corals like Pulsing Xenia or Anthelia, which do not always respond well to glue, you should have small pieces of live rock rubble and low-impact attachment tools like rubber bands or plastic toothpicks. These tools allow the coral to naturally grow onto the substrate over several days without the chemical heat generated by cyanoacrylate glues.
Disinfection is a non-negotiable step in the propagation process. Every time you cut a coral, you are creating an open wound vulnerable to bacterial pathogens like Vibrio. You’ll need to prepare a dipping station using a specialized solution. Pick up a bottle of Coral RX Pro Coral Dip and mix it with aquarium water according to the manufacturer’s instructions. Dipping the frags immediately after cutting helps slough off excess mucus and kills potential parasites that may be hiding in the folds of the coral’s skin. This step is also vital for the mother colony; if possible, basting the cut site on the parent coral with a diluted dip or simply ensuring high flow in that area will promote faster healing.
A Five-Step Guide to Fragging Leather Corals
Leather corals, such as the Toadstool (Sarcophyton) and Finger Leathers (Sinularia), are among the most resilient candidates for propagation. These corals have a distinct anatomy consisting of a stalk and a capitulum (the top crown where polyps reside). The goal of fragging these species is to take a healthy portion of the capitulum while leaving enough of the parent colony to regenerate. Follow this sequence to ensure the highest survival rate for your new specimens.
- Prepare the Workspace and Mother Colony: Remove the mother colony from the tank and place it in a shallow container filled with aquarium water. Allow the coral to retract its polyps fully. This makes the tissue denser and easier to cut accurately. Have your Oceans Wonders Coral Frag Plugs and glue ready before you lift the coral out of the water.
- Execute the Cut: Using a sterilized scalpel, slice a one-inch strip from the outer edge of the capitulum. For Sarcophyton species, a “donut cut” around the perimeter is common, which can then be sliced into several smaller cubes. Ensure the cut is clean and performed in one fluid motion to avoid jagged edges that take longer to heal.
- Disinfect the Frags: Place the newly cut pieces into a container of water treated with Coral RX Pro Coral Dip. Let them sit for 5 to 10 minutes. This helps the coral shed the thick mucus layer it produces during the cutting process and prevents opportunistic infections from taking hold in the fresh tissue.
- Secure the Frag to the Substrate: Soft coral tissue is notoriously difficult to glue because it is slimy and constantly moving. For Sinularia, you can use IC-Gel Coral Frag Glue for Reef Aquariums by patting the base of the frag dry with a paper towel before applying a generous amount of gel. For Sarcophyton cubes, many reefers find better success by using a plastic toothpick to pierce the base of the frag and then rubber-banding the toothpick to a frag plug. This holds the tissue firmly against the plug until the coral naturally attaches, usually within 7 to 14 days.
- Recovery and Placement: Move the frags to a low-to-medium flow area of the tank. Excessive flow will blow the frags off their plugs before they can attach, while too little flow allows detritus to settle on the wound, leading to rot. Monitor the mother colony for any signs of “black bug” or fungal infection at the cut site.
Propagating Zoanthids and Palythoa Safely
SAFETY WARNING: Many species of Zoanthid and Palythoa contain palytoxin, one of the most potent non-protein toxins known. This toxin can become airborne if the coral is cut or boiled, and it can enter the bloodstream through micro-cuts in your skin or through your mucous membranes (eyes, nose, mouth). Always wear heavy-duty nitrile gloves, full-wrap eye protection, and a face mask when fragging these corals. Perform the work in a well-ventilated area and never use hot water on these specimens. If you feel lightheaded, experience a metallic taste in your mouth, or have difficulty breathing after handling these corals, seek medical attention immediately.
Once safety measures are in place, fragging Zoanthus and Palythoa involves separating individual polyps or small clusters from the main colony. These corals grow on a mat called a coenenchyme. To propagate them, you’ll need to use a sharp blade to get underneath this mat and peel it away from the rock. If the colony is growing on a flat rock, you can often use bone cutters to snip off a small piece of the rock itself with the polyps attached. This is the preferred method because it avoids cutting the actual coral tissue, which minimizes toxin release and stress.
If you must cut the tissue, ensure you are working in a container of aquarium water to keep the toxins submerged. Use IC-Gel Coral Frag Glue for Reef Aquariums to fix the polyps to a new plug. A single drop on the bottom of the polyp mat is usually sufficient. Hold the polyp in place for 30 seconds to allow the glue to skin over before returning it to a dip container. Because Zoanthids are prone to “Zoa Pox” and fungal infections after being moved, a post-fragging dip in Coral RX Pro Coral Dip is essential. According to Coral RX official instructions, the dip should be used as a preventative measure to ensure no pests like Zoanthid-eating nudibranchs are transferred to the new plugs.
Optimizing Your System for How to Frag and Propagate Soft Corals
The success of your propagation efforts depends heavily on the stability of your water chemistry. While soft corals do not build large calcium carbonate skeletons like SPS corals, they still require specific mineral levels to maintain their internal structural elements known as sclerites. These microscopic calcium structures provide the “rigidity” that allows a leather coral to stand upright. If your alkalinity or calcium levels swing wildly, the coral will struggle to heal the tissue damage from fragging. You must maintain a specific gravity of 1.025 to 1.026 and an alkalinity between 8 and 9 dKH.
Maintaining low nutrient levels is equally important for the recovery of frags. High levels of phosphates can inhibit the healing process and encourage the growth of nuisance algae on the fresh cut of the coral. If algae begin to grow over the wound, the coral tissue will likely recede and die. You should aim for nitrates below 10 ppm and phosphates below 0.05 ppm. For detailed strategies on managing these levels, see our guide on how to control nitrates and phosphates in a reef tank.
In addition to the standard “Big Three” parameters (Alkalinity, Calcium, and Magnesium), soft corals benefit significantly from trace element supplementation, particularly Iodine. Iodine is used by many soft corals to help facilitate the shedding of their waxy outer skin and to protect against UV radiation. During the fragging process, Iodine acts as a mild antiseptic. Ensure your Magnesium levels are kept between 1300 and 1350 ppm to provide the necessary chemical buffer that prevents your Calcium and Alkalinity from precipitating out of solution.
| Parameter | Target Value | Range for Fragging |
|---|---|---|
| Salinity | 1.026 SG | 1.024 - 1.026 |
| Alkalinity | 8.5 dKH | 8.0 - 9.5 dKH |
| Calcium | 430 ppm | 400 - 450 ppm |
| Magnesium | 1350 ppm | 1280 - 1400 ppm |
| Nitrate | 5 ppm | 1 - 10 ppm |
| Phosphate | 0.03 ppm | 0.01 - 0.05 ppm |
Common Fragging Mistakes to Avoid
One of the most frequent errors made by beginners is fragging a coral that is already showing signs of stress. If a coral is not fully extended, is discolored, or has recently survived a major tank swing, it is not a candidate for propagation. Cutting a stressed coral often leads to rapid tissue necrosis (RTN), where the coral literally dissolves within hours. You must ensure the mother colony is thriving and growing vigorously before you attempt to divide it. This “vigorous growth” is the best indicator that the coral has the energy reserves necessary to heal a significant wound.
Another common mistake is using too much glue or the wrong type of adhesive. Standard super glue liquid is often too thin and will run across the surface of the coral, potentially covering the polyps or the mouth. This can suffocate the frag. You must use a gel-based cyanoacrylate. Even with the correct gel, applying too much can create a heat reaction that “cooks” the base of the delicate soft tissue. A small, pea-sized drop is all that is required. If the frag will not stay, do not add more glue; instead, reconsider your mounting method and perhaps switch to the “mesh and rubble” technique.
Finally, many hobbyists fail to provide the correct flow for new frags. It is a mistake to place a fresh frag directly in front of a powerhead. While flow is necessary to wash away mucus and bring oxygen to the wound, direct, laminar flow will strip the tissue right off the plug. Conversely, placing frags in “dead spots” allows bacteria to colonize the cut site. The ideal placement is an area of moderate, indirect, and turbulent flow. If you see the frag “vibrating” or if the tissue is being pushed hard to one side, the flow is too high. The goal is a gentle swaying motion that keeps the surface of the coral clean without causing mechanical stress.
FAQ: Frequently Asked Questions
How long does it take for a soft coral frag to attach to a plug?
The attachment time for soft corals varies significantly by species and the health of the specimen. On average, most soft corals like Xenia, Capnella (Kenya Tree), and Sarcophyton will form a biological attachment to a substrate within 7 to 14 days. During the first few days, the coral produces a heavy layer of mucus and begins to extend its basal disc or stolons toward the surface of the rock or plug. It is critical not to disturb the frag during this window. If you move the frag or if it is blown over by a powerhead, the attachment process starts over, and the coral loses valuable energy. Using a mesh covering over a small container of rubble is the most reliable way to ensure attachment for “slippery” species that refuse to stay glued to Oceans Wonders Coral Frag Plugs. Once you see the tissue creeping onto the rock, you can safely move it to a more permanent location in the tank.
Can I frag soft corals inside the display tank?
While it is technically possible to snip a piece of coral inside the tank, it is a practice you should generally avoid. When soft corals are cut, they release a cocktail of terpenes and other chemical defense compounds into the water column. In a closed system, these chemicals can trigger a stress response in other corals, leading to a “crash” or widespread polyp retraction. Furthermore, the mucus released during the process can clog the mechanical filtration or settle on other corals, causing localized tissue irritation. For Palythoa and Zoanthids, cutting inside the tank is extremely dangerous as it releases toxins directly into the water that your fish and invertebrates breathe. Always remove the coral to a separate container for the actual cutting and dipping process. This keeps the “mess” out of your display and allows you to use products like Coral RX Pro Coral Dip effectively without harming your beneficial tank bacteria or microfauna.
What should I do if my coral frag starts to turn white or “mushy”?
If a frag begins to turn white, translucent, or develops a fuzzy, mushy appearance, it is likely suffering from a bacterial infection or fungal rot. This is often caused by poor flow, improper dipping, or a compromised mother colony. The first step is to remove the failing frag from the tank immediately to prevent the infection from spreading. You can try to “save” the frag by cutting away the necrotic (mushy) tissue with a sterilized blade, ensuring you cut slightly into the healthy tissue to make sure no rot remains. After the “surgery,” perform an intensive dip in a solution like Coral RX Pro Coral Dip and place the frag in an area with slightly higher, more turbulent flow. If the majority of the frag is mushy, it is often better to discard it rather than risk the health of the entire system. According to the NOAA Coral Reef Conservation Program, environmental stressors are the primary drivers of coral disease, so check your water parameters - specifically temperature and alkalinity - if multiple frags begin to fail simultaneously.
Conclusion
Mastering the propagation of soft corals is a rewarding milestone for any reef keeper. By using the correct tools, such as sharp scalpels and IC-Gel Coral Frag Glue for Reef Aquariums, you can safely manage the growth of your colonies and share the beauty of your tank with others. Remember that safety is paramount, especially when dealing with toxin-bearing species like Palythoa. Consistent water chemistry and proper post-fragging care are the foundations of a high survival rate. As your frags grow and stabilize, you will find that your understanding of coral biology deepens, making you a more effective and responsible hobbyist. Start with a hardy species like a Toadstool Leather, follow the protocols strictly, and watch your reef thrive through your own active management.
Bookmark this guide to keep these safety protocols and water chemistry targets handy for your next fragging session.