How to dip corals before adding them to your tank
This post contains affiliate links. As an Amazon Associate, I earn from qualifying purchases at no extra cost to you. In our experience, the right approach makes all the difference.
Adding a new coral to your reef tank should be a moment of excitement, but without a strict dipping protocol, it is the most dangerous thing you can do to your ecosystem. You are not just buying a beautiful Acropora or a vibrant colony of Zoanthus species; you are potentially importing a Trojan horse filled with flatworms, nudibranchs, spiders, and predatory snails. If you choose to skip the dip, you are effectively gambling that the vendor’s systems are pristine. In my experience, even the most high end boutique coral farms occasionally struggle with pests. One single Amakusaplana acroporae (Acropora Eating Flatworm) can lay hundreds of eggs that will eventually decimate a multi thousand dollar collection of SPS corals. Dipping is the only proactive defense you have to ensure that your display tank remains a controlled environment rather than a battleground for infestations.
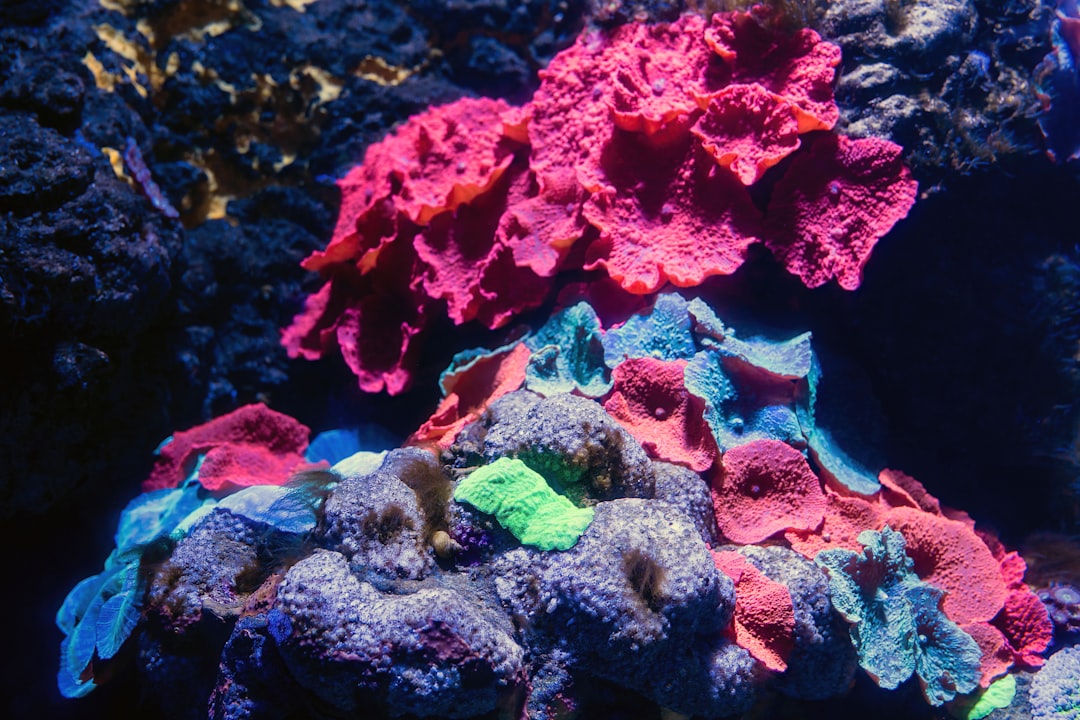
Photo by David Clode on Unsplash
Identifying the Pests You Are Fighting
The primary reason we dip is to eliminate hitchhikers that are either too small to see with the naked eye or experts at camouflage. The most notorious of these is the Acropora Eating Flatworm (AEFW). These pests are nearly translucent and hug the tissue of the coral, making them almost impossible to spot until you see the telltale circular bite marks and rapid tissue loss. They are particularly fond of smooth skinned Acropora species. If you do not dip, these worms will multiply in your rockwork and slowly consume your prize pieces from the base up. Another common threat is the Montipora Eating Nudibranch. These small, white, frilly creatures are incredibly destructive and can strip a large Montipora capricornis in a matter of days. They tend to hide on the underside of plates, away from the light, making them difficult to detect during a casual inspection at the local fish store.
Beyond flatworms and nudibranchs, you must also be on the lookout for Zoanthid Eating Spiders and Sundial Snails. The spiders are particularly insidious because they actually crawl inside the polyp, causing it to stay closed while they consume it from the inside out. Sundial snails (Heliacus areola) look like harmless mini snails but are specialized predators of colonial anemones and zoanthids. Then there are the “nuisance” hitchhikers like Aiptasia anemones and colonial hydroids. While these might not kill a coral overnight, they spread like wildfire and sting neighboring corals, leading to localized necrosis. By understanding that these pests are often species specific, you can tailor your inspection. For example, when you receive a shipment of Euphyllia (like torches or hammers), you should be specifically looking for Euphyllia eating flatworms or polyclad flatworms which are much larger and more aggressive than the AEFW variety.
Essential Water Chemistry for the Dipping Station
You cannot simply throw a coral into a bucket of dip and expect it to survive if the water parameters are swinging wildly. The dipping process is already a stressful event; the coral is being subjected to a mild neurotoxin or a caustic chemical designed to irritate pests. If you also subject it to osmotic shock or an alkalinity spike, you are asking for “RTN” (Rapid Tissue Necrosis). Before you even open the shipping bag, you need to prepare a dipping station using water that matches your display tank’s parameters exactly. This means your salinity should be at a stable 1.026 Specific Gravity (35ppt). Using a calibrated refractometer is non negotiable here. If the coral comes from a bag with a salinity of 1.023 and you drop it into 1.026, the sudden change in osmotic pressure can rupture the coral’s delicate membranes.
Alkalinity is the other critical factor. Most high end reefers keep their tanks between 8.0 and 9.0 dKH. If your dipping water is significantly higher or lower, the coral will likely “slime up” excessively, which can actually prevent the dip from reaching the pests hiding in the mucus layer. I highly recommend using the Hanna Marine Alkalinity Checker to verify your dipping water before you begin. You should also check your Calcium and Magnesium levels to ensure they are within the acceptable ranges of 420-450 ppm and 1300-1400 ppm respectively. For these measurements, the Salifert Master Reef Testing Combo Kit provides the precision needed to ensure the water is safe. If you prefer a more consolidated approach, the Red Sea Reef Foundation Pro Test Kit is an excellent alternative for tracking these three foundational elements. Temperature matching is also vital; use a reliable heater to keep the dipping buckets within one degree of your display tank temperature.
SAFETY WARNING: Coral dips are concentrated chemical solutions. Many contain pine oils, iodine, or proprietary insecticides that are toxic to humans if ingested or absorbed through the skin. Always wear nitrile gloves and eye protection when handling these chemicals. Never use the same containers for food preparation after they have been used for coral dipping. Furthermore, ensure your work area is well ventilated, as the smell of some dips can be quite pungent and irritating to the respiratory system.
Choosing the Right Dip for Your Corals
Not all dips are created equal, and some corals are more sensitive to certain chemicals than others. Generally, there are three categories of dips: iodine based, essential oil based (pine or citrus), and medicinal/insecticide based. Iodine based dips are fantastic as an antiseptic. They help the coral heal from any physical damage sustained during shipping and are effective against bacterial infections. However, they are not the best at “knocking off” stubborn pests like flatworms. For the heavy lifting, most experienced reefers turn to essential oil based dips. These products work by irritating the nervous system of the pests, causing them to lose their grip on the coral and fall to the bottom of the container.
For hardy corals like Pocillopora or Seriatopora, a standard essential oil dip is usually fine. However, when dealing with sensitive “smooth skin” Acropora or deep water species, you must be more cautious. Some reefers prefer to use a lower concentration for a longer duration to avoid “burning” the coral’s tissue. There is also the “Bayer” method, which involves using a specific brand of garden insecticide. While highly effective against AEFW, it is extremely toxic and requires a very thorough rinsing process to ensure no residue enters your reef tank. If you are a beginner, I suggest sticking to commercially available reef specific dips until you have a firm grasp of coral physiology. Regardless of the brand, the goal is the same: create an environment so hostile to the pest that it detaches, while keeping the environment just safe enough for the coral to survive the short exposure.
The Step-by-Step Dipping Protocol
Once your water is matched and your chemicals are ready, it is time to execute the dip. Start by placing the coral in a small container filled with enough tank water to fully submerge it. Add the recommended dosage of your chosen dip. I always use a small powerhead or a turkey baster to provide constant water movement during the dip. This is a critical step that many people skip. Pests like flatworms have an incredible ability to hold on to the coral’s skeleton. Without active agitation, the chemical may not reach the underside of the coral or the deep crevices where pests hide. Use the turkey baster to blast the coral from all angles. You will often see small “specks” fly off the coral; these are the pests you are trying to kill.
The duration of the dip should typically be between 5 and 15 minutes, depending on the manufacturer’s instructions and the health of the coral. If the coral starts to lose its color or “peel” tissue, remove it immediately. After the dipping period is over, move the coral to a second “rinse” bucket filled with clean tank water. This bucket should have no chemicals in it. Again, use a turkey baster to blast the coral, ensuring that any dead or dying pests are washed away and that the chemical residue is diluted. I prefer a two stage rinse process, using two separate buckets of clean water, to be absolutely certain that no dip enters my display tank. During the rinse, perform a final visual inspection under a magnifying glass. Look for the one thing that dips cannot kill: eggs.
Dealing with Eggs and Physical Removal
It is a common misconception that dipping kills everything. Most commercially available dips do absolutely nothing to the eggs of flatworms or nudibranchs. These eggs are protected by a tough, leathery casing that is impervious to the chemicals. This is why physical inspection and removal are the most important parts of the process. AEFW eggs are usually found at the base of the coral, where the live tissue meets the dead skeleton. They look like tiny, brownish or golden clusters. If you see them, you have two choices: scrape them off with a scalpel and then scrub the area with a toothbrush, or better yet, cut the coral off its original plug and discard the base entirely.
In fact, I recommend always removing corals from their original shipping plugs. Pests and their eggs love to hide in the porous ceramic or rock of the plug. By cutting the coral just above the base using a pair of bone cutters and mounting it to a fresh, clean plug, you eliminate about 90% of the risk. This is especially true for Zoanthus colonies, which often arrive on plugs covered in algae that can hide sundial snails or Aiptasia. If you are uncomfortable cutting the coral, you must be extremely diligent with a toothbrush, scrubbing every millimeter of the plug and the exposed skeleton. If you find eggs and cannot remove them entirely, that coral should never go into your display tank; it must go into a dedicated quarantine system for observation. For more on setting up such a system, see our guide on Reef Tank Quarantine Setup.
| Coral Type | Sensitivity Level | Recommended Dip Type | Key Pests to Watch For |
|---|---|---|---|
| Acropora (SPS) | High | Essential Oil / Iodine | AEFW, Red Bugs, Black Bugs |
| Montipora (SPS) | Medium | Essential Oil | Monti-eating Nudibranchs |
| Euphyllia (LPS) | Medium | Iodine / Essential Oil | Polyclad Flatworms, Brown Jelly |
| Zoanthus (Soft) | Low | Essential Oil | Zoa Spiders, Sundial Snails |
| Mushroom (Soft) | Low | Iodine (Brief) | Flatworms |
Common Mistakes and Troubleshooting
One of the most frequent mistakes I see is the “community dip” bucket. This is when a hobbyist buys five different corals and puts them all in the same bucket of dip at the same time. This is a recipe for disaster. Different corals have different tolerance levels. A hardy leather coral might be fine in a dip for 15 minutes, while a sensitive Acropora might start to bleach after five. Furthermore, if one coral is heavily infested, you are essentially bathing the other four corals in a concentrated soup of pests. Dip each coral individually, or at the very least, group them by species and sensitivity level. Always use fresh dip for each batch. The chemicals degrade over time and as they react with the coral’s mucus, and the “dirty” water becomes less effective at killing pests.
Another mistake is ignoring the “post dip” behavior of the coral. It is normal for a coral to stay closed for a few hours or even a day after a dip. However, if the coral does not extend its polyps within 48 hours, or if you see the tissue starting to turn white and flake off, you have likely over stressed it. This often happens if the water parameters in the dip bucket did not match the tank, or if the dip was too concentrated. In these cases, place the coral in a low light, medium flow area of your tank to recover. Do not move it around constantly; stability is the key to recovery. If you notice a “jelly-like” substance forming on LPS corals after a dip, this could be Brown Jelly Disease, which is an opportunistic bacterial infection. In this case, a targeted iodine dip might be necessary to save the colony.
FAQ
Can I dip corals that are already showing signs of tissue loss?
You should be very cautious when dipping a coral that is already stressed or “receding.” The dipping process is chemically aggressive and can be the final straw that kills a dying coral. However, if the tissue loss is being caused by an active pest infestation, you have no choice but to dip. In these scenarios, I recommend using a half strength solution of an iodine based dip. Iodine acts as a disinfectant and can help stop the spread of bacterial necrosis while being slightly less harsh than essential oil based dips. If the coral is an SPS variety, ensure your alkalinity and calcium are perfect using a Red Sea Reef Foundation Pro Test Kit before attempting a rescue dip.
Is it safe to dip sponges or anemones?
Generally, no. Sponges are incredibly sensitive to air exposure and chemical changes; dipping them usually results in a total meltdown that can foul your tank water. Anemones, including Entacmaea quadricolor (Bubble Tip Anemones), should also not be dipped in standard coral dips. Their bodies are mostly water, and the chemicals will penetrate their internal tissues, leading to death. The best way to handle anemones and sponges is a thorough manual inspection and a long period in a quarantine tank. If you see a pest on an anemone, you must remove it manually with tweezers rather than relying on a chemical bath.
How do I know if the dip actually worked?
The proof is in the bottom of the bucket. After you remove the coral and the agitation is finished, let the water settle and look at the bottom with a flashlight. You will likely see various “shrimp-like” pods (which are usually harmless), but you are looking for the flatworms and nudibranchs. If you see pests, the dip worked to remove the adults. However, remember that the presence of adults almost guarantees the presence of eggs. If you find pests in the dip bucket, you must be twice as diligent in your inspection for eggs and consider a second dip in 5 to 7 days to catch any newly hatched larvae.
Conclusion
Dipping your corals is the single most effective habit you can develop to ensure the long term success of your reef tank. It requires patience, the right tools, and a disciplined approach to water chemistry, but the payoff is a pest free environment where your corals can thrive. By matching your parameters, choosing the right chemical agent, and performing a rigorous physical inspection, you remove the variables that lead to tank crashes. Never trust a “clean” look; always assume there is a hitchhiker waiting to move in. Once you have finished the dip and rinse process, your next step is ensuring the coral is placed in the optimal environment for recovery.
Check out our guide on 2026 04 03 Coral Placement Guide Light And Flow to make sure your newly dipped corals have the best start possible.
Related reading:
Enjoyed this guide? Bookmark it for later or share it with a friend who might find it useful.